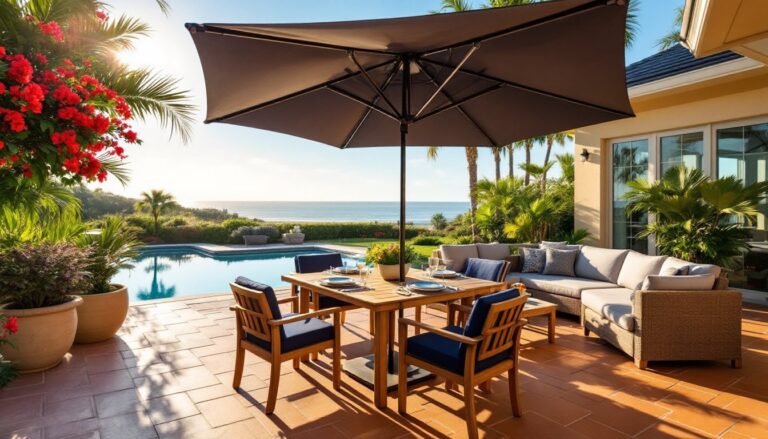
Patio furniture takes a beating. Sun, rain, spilled drinks, and years of lounging wear down even quality fabrics until they’re faded, cracked, or coming apart at the seams. The good news? You don’t need to replace the entire piece. Patio furniture fabric replacement is a straightforward DIY project that costs a fraction of buying new furniture and gives your outdoor space an instant refresh. Whether you’re dealing with cushions, slings, or chair seats, this guide walks you through selecting the right material, measuring accurately, and completing the swap yourself in an afternoon.
Table of Contents
ToggleKey Takeaways
- Patio furniture fabric replacement is an affordable DIY project that extends the life of outdoor pieces without replacing the entire furniture frame.
- Choose solution-dyed acrylic or polyester fabrics specifically labeled for outdoor use, such as Sunbrella, to resist UV fading, water damage, and mildew for years.
- Accurately measure all dimensions including depth for cushions and add 10 percent extra fabric for cutting waste and future repairs to avoid costly mistakes.
- Secure replacement fabric using a pneumatic staple gun with stainless steel staples every 2-3 inches, pulling fabric taut to prevent wrinkles and sagging.
- Extend your new fabric’s lifespan through weekly brushing, monthly rinsing with a garden hose, and immediate repairs of small tears using outdoor fabric patch kits.
Why Replace Your Patio Furniture Fabric
Signs Your Fabric Needs Replacement
Fabric deterioration doesn’t happen overnight, but several telltale signs show it’s time for patio furniture fabric replacement. Fading is often the first thing you’ll notice, UV exposure bleaches even premium outdoor fabrics after three to five years. Cracks and peeling indicate the protective coating is breaking down, allowing water penetration and mold growth. If you can poke a hole through the material with your finger, or if seams are splitting and fraying, the fabric has lost structural integrity.
Spots that don’t wash out, visible mold or mildew (usually on the underside), and a sticky or stiff feel all signal that replacement is worth your time and money. Cushions that no longer hold their shape after sitting, or covers that don’t fit the frame anymore, also warrant attention. The beauty of this project is that new fabric can completely transform a piece that still has solid bones, the frame, springs, or structure underneath is often fine.
Choosing the Right Replacement Fabric
Not all fabrics work for outdoor use. Standard cotton or canvas will rot within a season. You need solution-dyed acrylic or polyester specifically labeled for outdoor or performance use. These materials are engineered to resist UV fading, shed water, and resist mildew. Sunbrella is the industry standard, it’s durable and comes in hundreds of colors, but brands like Outdura, Phifertex, and Ballard Designs’ house brand offer similar performance at varying price points.
Fabric weight matters too. Light fabrics (around 5–6 ounces per square yard) work for cushion covers and slings. Heavier performance fabric (8–12 ounces) suits high-traffic seating or lounge chairs that take regular use. Check the fabric’s breaking strength rating (higher is better) and its mildew and fade ratings. Outdoor fabric typically carries a 500+ hour UV rating, meaning it won’t significantly fade for years.
Color and pattern choices depend on your space and aesthetic. Solid colors hide stains better than patterns, but don’t dismiss textured or patterned outdoor fabrics, they’re available and can add visual interest. Buy slightly more fabric than your measurements call for: most suppliers recommend adding 10 percent for cutting waste and future repairs. If you’re working with existing hardware like piping or binding, confirm the replacement fabric coordinates with those elements.
Measuring and Preparing for the Project
Accurate measurement prevents costly mistakes. For cushion covers, measure length, width, and depth (the thickness of the cushion). Write down all three dimensions: a 24-inch-by-24-inch cover that’s 4 inches thick needs more fabric than one that’s 2 inches thick. For chair slings or backs, measure height and width from edge to edge, then add 2 inches on each side for seam allowance or hem.
If you’re replacing multiple pieces, lay out all measurements on paper and note which fabric goes where, it’s easy to mix up dimensions when you’re working with several similar-sized items. Take a photo of the original cover’s stitching pattern and seams, especially if there are welting (piping), contrasting bands, or special details. This becomes your reference later.
Before you start cutting new fabric, inspect the piece’s frame and structure. Check for loose screws, bent or rusted hardware, and damaged wood or metal. Tighten fasteners now: loose frames won’t sit right once you add new fabric. If the frame is damaged beyond tightening, that’s a separate repair and may require professional help.
Gather your supplies: new outdoor fabric, scissors or a rotary cutter, measuring tape, and a serger or sewing machine rated for heavy-duty fabric. A serger finishes seams with an overlock stitch and is ideal, but a standard machine with an 80/12 or 90/14 needle designed for heavy fabric works fine. Have thread in a matching or neutral color on hand, and test your stitch tension on scrap fabric first.
Step-by-Step Fabric Replacement Instructions
1. Remove the Old Fabric
Flip the furniture piece over or position it so you can access the underside. Look for staples, screws, or stitching holding the old fabric. Use a flathead screwdriver or staple remover to pry out staples, working carefully to avoid damaging the frame. A cordless drill with a screw bit makes quick work of fasteners. If the cover is sewn, use a seam ripper or small scissors to cut stitches on the underside. Once fasteners are removed, peel away the old fabric slowly, it may be stuck with adhesive or mold, so patience pays off.
2. Clean the Frame
With the old fabric off, wipe down the frame with a damp cloth to remove dust, mold spores, and debris. Let it dry completely. If you find rust on metal frames, lightly sand it with 120-grit sandpaper and apply a thin coat of rust-preventative spray paint. For wood frames, check for soft spots or rot (press with your finger, solid wood doesn’t compress). Minor rot can be cut out and patched: extensive rot means the piece isn’t safe to use.
3. Cut and Position New Fabric
Lay new fabric on a clean, flat surface. Using your measurements and reference photos, mark cutting lines with tailor’s chalk or a fabric marker. Cut straight lines with sharp scissors or a rotary cutter and straightedge. For cushion covers, cut a rectangle or panel slightly larger than the foam to ensure full coverage when you wrap it. Add 1.5 to 2 inches extra on all sides for seam allowance or wrapping around edges.
Position the fabric over the frame, centered and square. For cushions, pull it taut but not stretched, fabric should have a slight give. For sling-style seating (think chaise lounges), the fabric should hang evenly without bunching.
4. Secure the Fabric
If you’re stapling (the most common method for furniture frames), use a pneumatic staple gun with 3/8-inch staples and start on one long side. Pull the fabric taut as you go, stapling every 2 to 3 inches. Then staple the opposite side, pulling evenly so the fabric doesn’t wrinkle. Move to the short sides, pulling and stapling. For corners, fold the fabric neatly (a hospital corner fold works well) and staple down the fold.
If you’re sewing a cover, lay fabric pieces with right sides together, mark your seam line with tailor’s chalk, and sew using a 1/2-inch seam allowance. A performance fabric thread (like Gutermann’s Mara thread) holds better than standard thread. Finish raw seams with a zigzag stitch or serger to prevent fraying. As DIY home decor projects demonstrate, finished seams look professional and last longer.
5. Add Finishing Touches
Once fabric is secured, inspect for wrinkles, bunching, or loose areas. Smooth and re-staple if needed. If the original piece had piping, binding, or welting, add these now, they hide staples and staple lines, giving a finished appearance. Many upholstery suppliers sell pre-made piping in outdoor fabric that you can glue or sew along edges.
Maintenance Tips to Extend Your New Fabric
Your newly recovered furniture will last longer with basic care. Brush off loose dirt and debris weekly with a soft-bristled brush or vacuum with an upholstery attachment. This prevents grit from becoming embedded. Once a month, rinse cushions and covers with a garden hose on a gentle setting to wash away dust and prevent mildew growth.
For spots and stains, use a mild solution of water and a small amount of dish soap. Scrub gently with a soft brush, rinse thoroughly, and air-dry in the sun (sun actually helps kill mildew). Avoid bleach and harsh chemicals, they degrade the protective coating on performance fabrics. When not in use for extended periods (winter storage, for example), store pieces in a dry area or cover them with a breathable tarp. Plastic sheeting traps moisture and accelerates mildew growth.
If the fabric gets a small tear or puncture, repair it immediately with an outdoor fabric patch kit or a needle and matching thread. Leaving a hole allows water and mold inside, turning a minor issue into a major one. Experts agree that home improvement maintenance guides often emphasize prevention over replacement, small fixes now save big expenses later.
Inspect seams and staple lines twice a year. Re-staple any loose sections, and check for rust or corrosion forming around staples. If staples are rusting badly, pull them out and replace with stainless steel staples: plain steel rusts and stains fabric. Keep your furniture out of direct sun when not in use if possible, extended UV exposure fades even premium fabrics. A pergola, awning, or simple shade cloth makes a big difference in fade prevention.
Conclusion
Patio furniture fabric replacement is a cost-effective way to extend the life of outdoor pieces and refresh your entertaining space. With the right materials, accurate measurements, and straightforward techniques, you can tackle this project in a single afternoon. The result is furniture that looks new, functions properly, and is ready for years of backyard use. Your outdoor space will thank you.